
A kitchen backsplash budget depends less on the tile itself and more on the full scope of the work: material, square footage, layout complexity, wall prep, cuts around outlets and windows, trim, grout, sealing, and whether any electrical or plumbing changes are involved. For most homeowners, ceramic and porcelain tiles offer the strongest balance of durability, timeless style, and easy care, while glass tiles and natural stone tiles create more distinctive looks with different maintenance and installation considerations. A typical kitchen backsplash covers roughly 15 to 40 square feet, so small choices show up quickly. If you’re planning a kitchen refresh and want to feel confident before you request quotes, this guide walks you through the decision the way we do with clients: material first, then layout, then scope, then the quote.
Start With the Role Your Backsplash Needs to Play
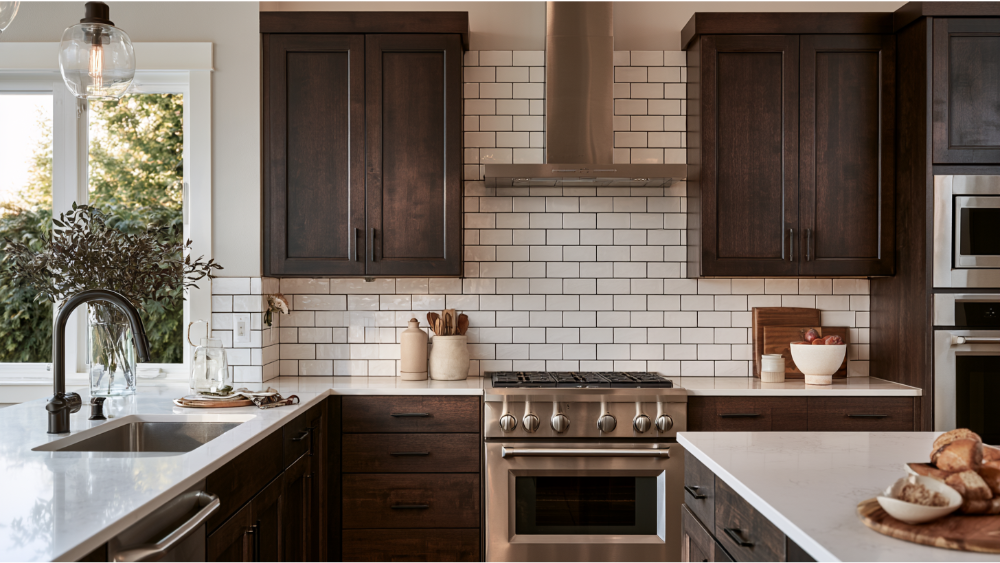
Your backsplash does two jobs. It protects the kitchen walls behind your counters and range from grease, steam, and daily splatter, and it visually connects your countertops, cabinets, flooring, and appliances into one room that reads on purpose. Before you fall for a tile online, decide which of those jobs matters more to you right now.
The early question that shapes everything else is simple: should the backsplash stay quiet and let the counters and cabinets lead, or should it be the focal point people notice first? A quiet backsplash disappears into a calm, timeless kitchen. A bold one becomes the feature wall behind the range. Both are right. But that single choice drives material, layout, height, and cost, so it’s worth settling early.
One practical note: backsplash decisions read best once your countertop material and cabinet direction are set. The backsplash lives between those two surfaces, and choosing the right backsplash in isolation is how homeowners end up with a tile that fights the counter it sits under. If you’re leaning toward white cabinetry, for example, a soft white subway tile backsplash will read very differently than a dark, glossy field. In the 2026 Houzz U.S. Kitchen Trends Study, 85% of renovating homeowners upgraded the backsplash as part of their kitchen project, so it’s rarely an afterthought anymore. It’s part of how the whole room and its interior design come together.
Kitchen Backsplash Tile Materials, Layouts, and What to Budget
Four backsplash materials cover almost every kitchen backsplash: ceramic tile, porcelain tiles, glass tiles, and natural stone tiles. The right tile for you comes down to how you actually live in your cooking space, how much cooking grease you generate, how you like to clean, how much light the room gets, and how visible you want the grout lines to be. Houzz data gives a useful snapshot of what homeowners are choosing right now among tile backsplashes:
- Ceramic tile: 49%
- Porcelain tiles: 23%
- Glass tiles: 7%
- Marble: 6%
- Zellige: 4%
Ceramic and porcelain tiles lead by a wide margin for good reason. Here’s how each backsplash tile behaves once it’s on your wall.
Ceramic Tile: The Versatile, Timeless Choice
Ceramic tile is the most common backsplash tile, and it earns that spot. It comes in a broad range of shapes, colors, and finishes, so it works in nearly any kitchen style from classic to contemporary. It’s lightweight, straightforward to cut, and easy to maintain, which keeps it a sensible value for homeowners who want quality they can afford without sacrificing durability or design flexibility.
Glazed ceramic tile wipes clean easily, which matters directly behind a cooktop where splatter collects. The classic ceramic subway tile has stayed in style for over a century because it pairs with almost anything and doesn’t tie you to a trend. Subway tiles in a soft white read as timeless, while a colorful backsplash or hand-glazed version gives you more personality. If you want a smooth surface that looks intentional today and still looks right in ten years, ceramic tile is hard to beat. It gives you room to be expressive with color or restrained with a simple white field, depending on whether you want the backsplash to lead or recede.
Porcelain Tile: Denser and Built to Last
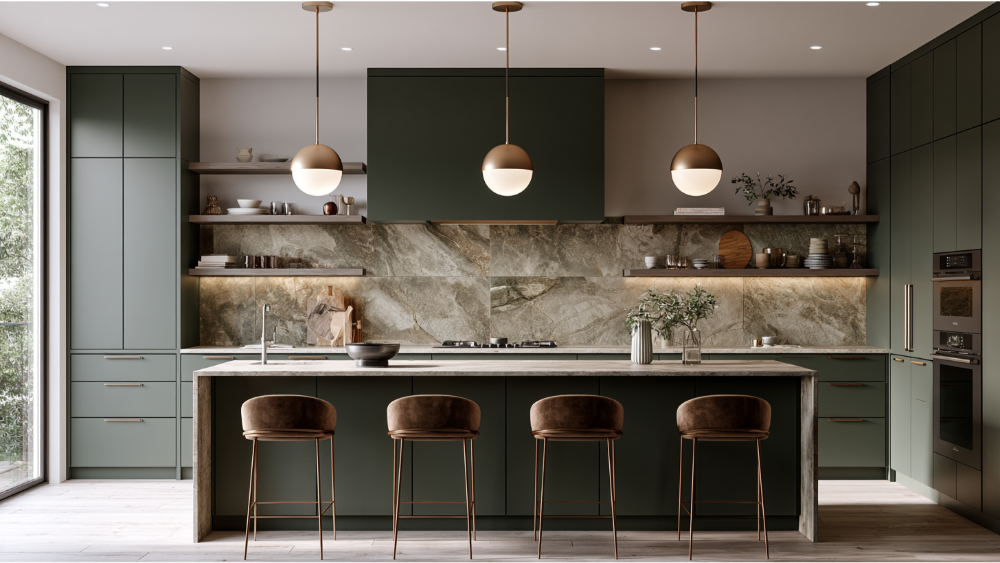
Porcelain is ceramic’s denser cousin. By the TCNA and ANSI definition, porcelain absorbs 0.5% or less water, which makes it essentially impervious. That density is why porcelain tiles hold up so well in a working kitchen and why they’re a smart pick when easy care and longevity are your priorities. These are the kind of durable surfaces that reward daily use, and glazed porcelain is usually even easier to clean than unglazed, because the glaze fills the microscopic surface pores.
Porcelain also opens up an option worth knowing about: large format tiles and slab-look pieces that mimic marble or stone with far fewer grout lines. You get the elegance of natural stone tiles with less maintenance and no acidic-cleaner worries. The tradeoff is that porcelain is harder and can require specific setting materials and a diamond-blade tile cutter, which is one reason a clean porcelain install rewards professional hands. When it’s done right, it delivers enduring strength with a finished look that feels timeless. Between ceramic and porcelain tiles, both belong in the same conversation, and the choice often comes down to look, size, and cost per square foot.
Glass Tile: Bright, Reflective, Detail-Sensitive
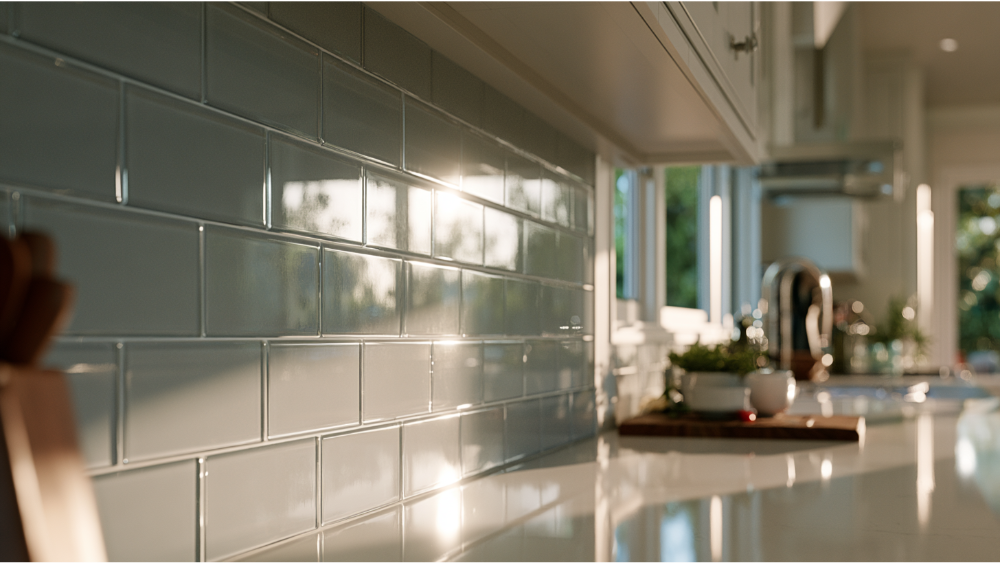
Glass tiles reflect light instead of absorbing it, so they can open up a smaller or darker kitchen and give a modern kitchen a clean, luminous finish. Because they reflect light so readily, they make the most of whatever natural light the room already gets. Glass tile is nonporous, which means it wipes down easily and never needs sealing. For a bright, contemporary space, few materials do it better, and a glass tile backsplash can double as a subtle focal point behind the range.
Glass rewards careful installation. The tiles are often translucent, so the adhesive and setting technique show through if they’re applied unevenly, and precise cuts matter because chips and flaws are visible in a way they aren’t with opaque tile. Glass tile has its own industry standard, ANSI A137.2, covering things like translucence, strength, and mounting, which is a good reminder that material and setting choices should follow manufacturer and industry guidance. Glass is elegant, but it’s detail-sensitive, and the quality of the install shows.
Natural Stone Tile: Unique Character, More Care
Marble, travertine, slate, and limestone bring something manufactured tile can’t: genuinely one-of-a-kind patterns and a high-end, natural character. A marble backsplash reads as an heirloom surface, and no two installations look exactly alike. Marble is a luxurious material, and that uniqueness is the appeal of stone tiles and natural stone slabs alike. Carried up the wall, a stone backsplash brings depth that few other surfaces match.
Stone asks for more attention in return. It’s porous, so it benefits from sealing to stay stain resistant, and the schedule depends on the specific stone and product, which is why following the material and manufacturer guidance matters. For cleaning, the Natural Stone Institute recommends a neutral cleaner, stone soap, or a mild liquid dish detergent with warm water, and advises against acidic cleaners, which can etch the surface. Behind a stove that sees a lot of tomato sauce and citrus, that’s worth thinking through honestly. If you love the look but not the upkeep, a slab-look porcelain that mimics stone gives you much of the elegance with far less maintenance.
What About Slab, Metal, and Peel and Stick Tiles?
Tile isn’t the only path. About 28% of Houzz respondents chose a slab backsplash, which uses the same material as the countertop carried up the wall for a continuous, grout-free look. A marble slab handled this way is clean and cohesive, and it tends to cost more, with natural stone or metal options often running $30 or more per square foot.
Metal backsplashes are durable and heat-resistant, which suits an industrial or modern kitchen, though they show fingerprints and water spots. Peel and stick tiles exist for quick, temporary updates and rentals, and a DIY installation of peel and stick backsplashes has its place. Just be clear-eyed about it: it isn’t the durable, built-to-last result most remodels are after. If you’re investing in a kitchen you’ll keep, real tile or slab is where the value holds.
Which Backsplash Tile Is Easiest to Clean?
If low maintenance is your top priority, the easiest materials to keep clean are glass tiles and glazed ceramic and porcelain tiles. All three are nonporous or near-nonporous and wipe down with everyday cleaners, which is exactly what you want behind a busy cooktop. Natural stone tiles sit at the other end, since they’re porous, benefit from sealing, and need neutral rather than acidic cleaners.
Here’s the part many guides miss: the tile isn’t the only thing you clean. Cleaning grout takes real effort, because grout lines collect grease and grime, so the more grout you have, the more scrubbing you do. Fewer, larger tiles mean fewer grout lines and less maintenance over time. That’s why cleaning ease is really a layout question as much as a material one, which brings us to the next decision.
Backsplash Layouts That Change the Look and the Quote
Layout is a cost driver, not only a style choice. The more individual tiles a pattern cuts up and the tighter the alignment it demands, the more labor goes into it, and that shows up in your quote. Understanding this early helps you weigh the look you want against what it takes to install it well. Houzz data shows what most kitchens actually use:
- Rectangular tile: 68% (with square at 13%, hexagonal 5%, diamond 3%, octagonal 1%)
- Horizontal brick pattern: 41%
- Horizontal stack: 11%
- Herringbone: 7%
- Vertical stack: 6%
- Mosaic: 6%
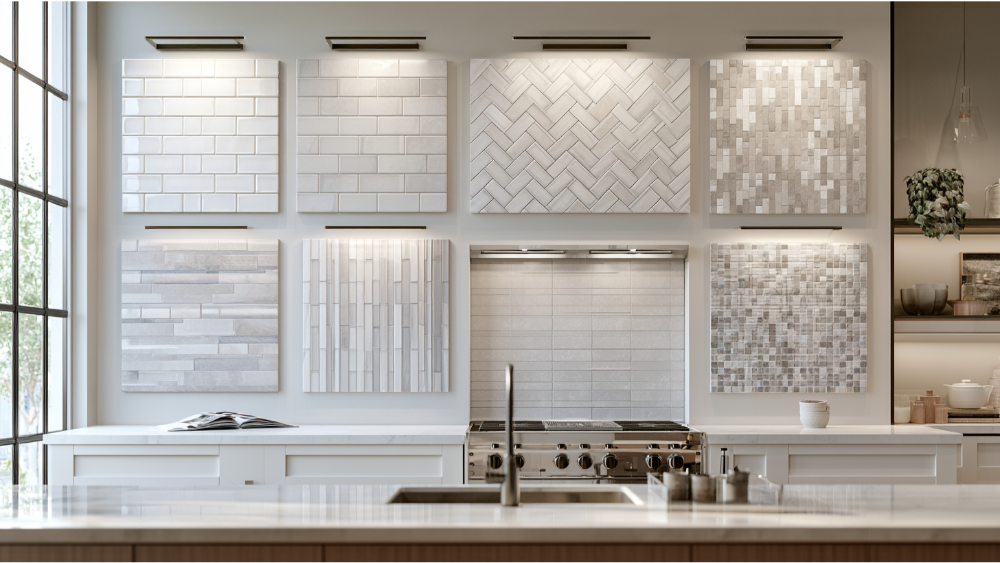
Horizontal Brick and Subway Tile Layouts
The horizontal brick layout, most familiar as an offset subway tile backsplash, is both the most common and the most timeless. Setting each row shifted from the one below hides small variations and forgives an imperfect wall better than a rigid grid. Subway tiles suit nearly every kitchen and rarely look dated, which is why they stay at the top year after year.
How Grout Color and Dark Grout Transform a Layout
The detail that transforms a subway tile backsplash is grout. A soft white grout keeps the wall continuous, while a dark grout outlines each tile and turns a plain layout into a graphic feature. That kind of dark backsplash effect gives you a dramatic backsplash without changing a single tile. Same tile, very different room. It’s one of the ways to save money and still change the entire mood, so it’s worth deciding on grout color as deliberately as the tile itself.
Stacked, Herringbone, and Chevron Layouts
A stacked layout, whether horizontal or vertical, reads clean and modern because the grout lines align into a crisp grid. That precision is also its demand: any waver in spacing or a wall that isn’t true will show immediately, so stacked patterns reward a careful hand and level setting. Paired with white cabinetry and a modern kitchen palette, a tight stack of subway tiles looks especially deliberate.
A herringbone pattern and chevron layouts add real movement and a sense of craft, along with the kind of geometric patterns that catch the eye, but they come at a price. Is herringbone more expensive to install than a subway tile backsplash? Usually, yes. Both patterns require far more individual cuts, more precise angles, and more layout time to keep the weave consistent and centered. The material cost per square foot may be similar, but the labor is higher, and that’s a fair reflection of the skill it takes to lay them right.
Mosaic and Large-Format Tile Layouts
These sit at opposite ends of the spectrum. Mosaic tiles pack in intricate detail and make a strong statement feature, ideal for a focal area behind the range. Glass tiles are common in mosaic sheets, adding light and color. The catch is that sheet-to-sheet alignment and consistent grout spacing are easy to get wrong, and any misalignment reads as a wavy seam across the wall.
Large-format and slab-look tiles go the other direction, giving you a nearly seamless look with fewer grout lines and easier cleaning. That seamless transition from tile to counter or corner is part of the appeal. Fewer joints can also mean less installation time on a straightforward wall. But the precision moves into cutting and leveling: big tiles are unforgiving of a wall that isn’t flat, and edges around outlets and corners have to be exact. Both looks are achievable; they just ask for different skills.
Edges, Trim, and Transitions
Where the backsplash ends is where an average install and a careful one part ways. The finish at a window, an open wall, a corner, or the edge beside a range hood shapes the whole look, and generic guides tend to skip it. Your options include bullnose tile with a rounded finished edge, a metal edge profile, a mitered corner, or a clean square cut, and each changes both the materials and the labor. If your counters run into wood floors nearby, coordinating those warm wood tones keeps the whole room feeling intentional.
These transitions are the small decisions that separate a backsplash that looks built-in from one that looks stuck on. It’s exactly the kind of detail we plan before the first tile goes up, because fixing it afterward is far harder than getting it right the first time.
How High Should a Kitchen Backsplash Go?
Most kitchens run the backsplash up to the underside of the wall cabinets and the range hood, and that’s the standard for good reason. Houzz shows how homeowners divide on coverage:
- Full coverage to cabinets/range hood: 67%
- Partial coverage to cabinets/range hood: 18%
- Full-height to the ceiling: 10%
- Partial coverage to the ceiling: 3%
The standard height keeps things proportional and protects the walls where they get the most splatter. A full-height backsplash carried all the way to the ceiling makes a dramatic statement, and it works especially well behind a striking range hood or above floating shelves where there are no upper cabinets to stop the run. It also uses more tile and more labor, so it’s a design decision with a budget attached.
To choose, look at your cabinet layout and where the uppers land, whether you have a hood or open shelves that leave more wall exposed, and how any windows interrupt the run. If your kitchen has a natural focal wall with no cabinets, full-height is often worth it. If cabinets frame the space tightly, the standard height usually looks cleaner and costs less per square foot of finished wall.
What to Budget For, Without Guessing
The honest answer to “what will this cost” is that it depends on scope, and the best thing you can do is understand the drivers before you ask for a number. National cost guides consistently point to the same factors, and knowing them helps you read any quote you receive. Here’s what moves the budget:
- Square footage and height: more wall means more tile and more labor.
- Tile material and size: ceramic and porcelain tiles differ from glass tiles and stone tiles in cost per square foot, and tile size affects cut count.
- Pattern complexity: herringbone and mosaic tiles take more time than a simple brick offset.
- Demo and disposal: removing an old backsplash and hauling it away is added labor.
- Wall repair and surface prep: damage found behind an old backsplash can change the scope.
- Outlets, switches, windows, corners, and trim: every obstacle means precise cuts and finishing.
- Grout type, color, and sealing: stone and some grouts require sealing; specialty grout adds cost.
- Electrical, plumbing, or cabinet and countertop changes: anything beyond finish work expands the project.
- Timing with countertop installation: coordinating the backsplash with counters affects sequencing.
- What the quote includes: materials, labor, prep, cleanup, and finishing details should all be spelled out.
One planning tip if you’re estimating tile quantity yourself: add a 10% to 15% waste factor to the square foot total to account for cuts, breakage, and future repairs. If you’re working with a modest budget, planning ahead like this is how you avoid surprises. Rather than chase a guess, the smarter move is to bring clear information to a consultation and get a quote built around your actual kitchen.
Bring This to Your Consultation
The more you can share up front, the more accurate and reliable your quote will be:
- Photos of your kitchen, including the backsplash areas.
- Approximate width and height of the backsplash runs, and the rough square footage if you have it.
- The backsplash tile material you’re considering, or inspiration photos.
- Your desired height: to the cabinets, the hood, or the ceiling.
- Any outlet or switch changes you want.
- Whether an old backsplash needs to come out.
- The age of your home, especially if it was built before 1978.
- Whether your countertops and cabinets are already installed.
Kitchen Backsplash Ideas Worth Considering
If you’re still gathering backsplash ideas, it helps to start from the mood you want rather than a single tile. A few kitchen backsplash ideas cover most of what homeowners are drawn to, and each pairs a functional benefit with an aesthetic payoff.
- Classic white subway tiles with dark grout. One of the most requested kitchen backsplash ideas, this pairs a timeless field of subway tiles with dark grout to outline each piece and create a striking contrast. It reads clean against white cabinets and adds just enough definition to feel intentional.
- Slab-look porcelain behind the range. Large porcelain tiles that mimic marble create a near-seamless focal point with minimal grout lines, giving a modern kitchen the drama of stone with easier care.
- Light-catching glass tiles. In a smaller or north-facing room, glass tiles reflect light and brighten the space, a simple way to make a compact kitchen feel open.
- Mosaic tiles as a feature panel. Reserve mosaic tiles for the wall behind the cooktop and keep the rest simple, so the detail becomes a focal point instead of overwhelming the room.
- Natural stone tiles for character. If your interior design leans toward warm, organic natural materials, stone tiles bring one-of-a-kind veining that no manufactured tile can match.
Color choices pull a room together too. A neutral color palette with brass hardware feels warm and calm, while a colorful backsplash against gray cabinets or blue cabinets adds energy. A tile that works as a solid backdrop lets the counters and hardware do the talking. Against wood cabinetry, warm wood tones, and black appliances, the same tile can shift the whole feel of the room. The best kitchen backsplash ideas are the ones that fit how you cook, clean, and live in a neutral kitchen or a bolder one, not just what photographs well. When you narrow your backsplash ideas down, think through material, layout, grout color, and how each choice sits against your counters, cabinets, and floors.
Sacramento and California Planning Notes
Most of this guide applies to any kitchen in the country, but a few local points matter if you’re in the Greater Sacramento Area. The City of Sacramento lists tiling and similar finish work among projects exempt from a building permit, so a straightforward backsplash swap often doesn’t require one. But related work can, such as relocating an electrical fixture or outlet to accommodate new cabinets or counters. When your project stays finish-only, you’re usually in the clear; when it touches electrical or plumbing, check with your local jurisdiction.
California also has consumer protections worth knowing. The Contractors State License Board requires a written contract for home improvement projects over $500, and CSLB guidance says a licensed contractor is required when a job needs a permit, uses employee labor, or is valued at $1,000 or more in combined labor and materials. Before hiring anyone, you can verify their license status and complaint history using the CSLB license lookup tool at cslb.ca.gov.
If your home was built before 1978, removing an old backsplash can disturb painted wall surfaces, which may trigger the EPA’s Renovation, Repair and Painting requirements for lead-safe work practices. There’s a minor-work exemption for disturbing 6 square feet or less per room indoors, but it’s a good reason to work with a contractor who understands those rules rather than a guess-and-go approach.
Why Professional Layout Matters
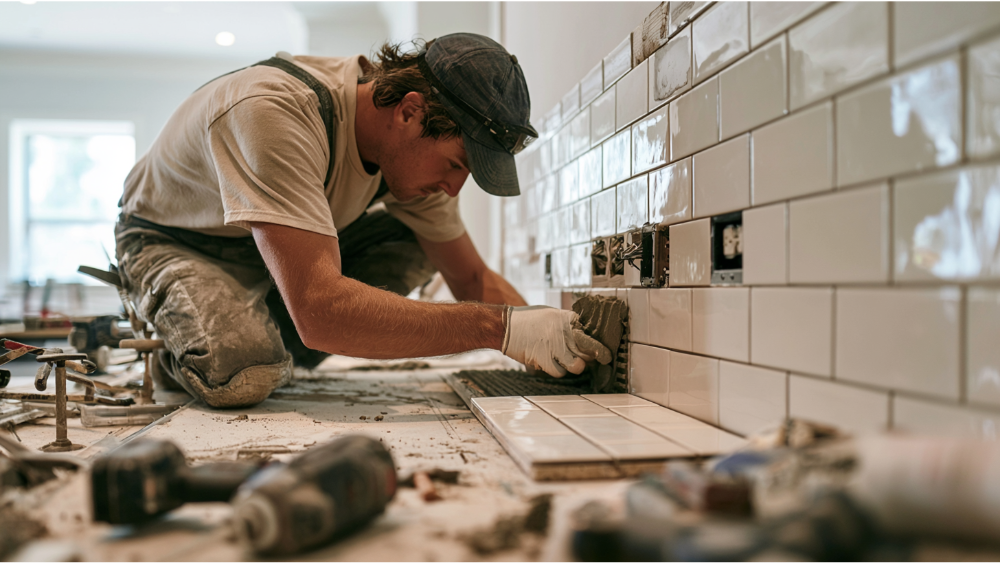
A backsplash is a small surface where every imperfection is at eye level, which is why layout planning is where craftsmanship earns its keep. Good layout centers the pattern on a focal point, like the space behind the range, so the eye lands on a full tile rather than a random seam. It avoids awkward sliver cuts at the ends of a run, keeps grout lines straight and consistent, and handles outlets, switches, windows, and corners so the finished wall looks composed rather than pieced together.
These are the decisions made before any adhesive goes on the wall, and they’re hard to undo once tile is set. Since starting his tile career in 2003, our founder has given each project the personalized attention it deserves, and that shows most in the details a rushed install skips. We plan the layout with
